Usage example#
Here we give a full real example of usage of the MRV API, with the hope of clarifying API concepts and showing the potential of MRV automated analyses.
Along this example, we are going to manually add some new fields to our MRV client, then run a Cover Crops and NDVI analyses on them, and finally access the results. This example should be fully reproducible by any user of the API, so it is also a good test case in case you are exploring the API capabilities by yourself.
Warning
Before going forward with these examples, you must authenticate as an MRV API client which has
permission to perform the cover-crops and ndvi capabilities. You can learn how to do
this in the API Access and Client-Product Authorisation sections, respectively.
Create new fields#
The very first thing we need to do is to register some fields in our MRV database. As it can be seen in the Field definition, we can give a custom identifier to the field and specify a geometry for the field boundaries.
Let’s take as an example a couple of fields in West Hagbourne, Oxfordshire, UK. We can see them better and select their boundaries using an online map application like https://geojson.io:
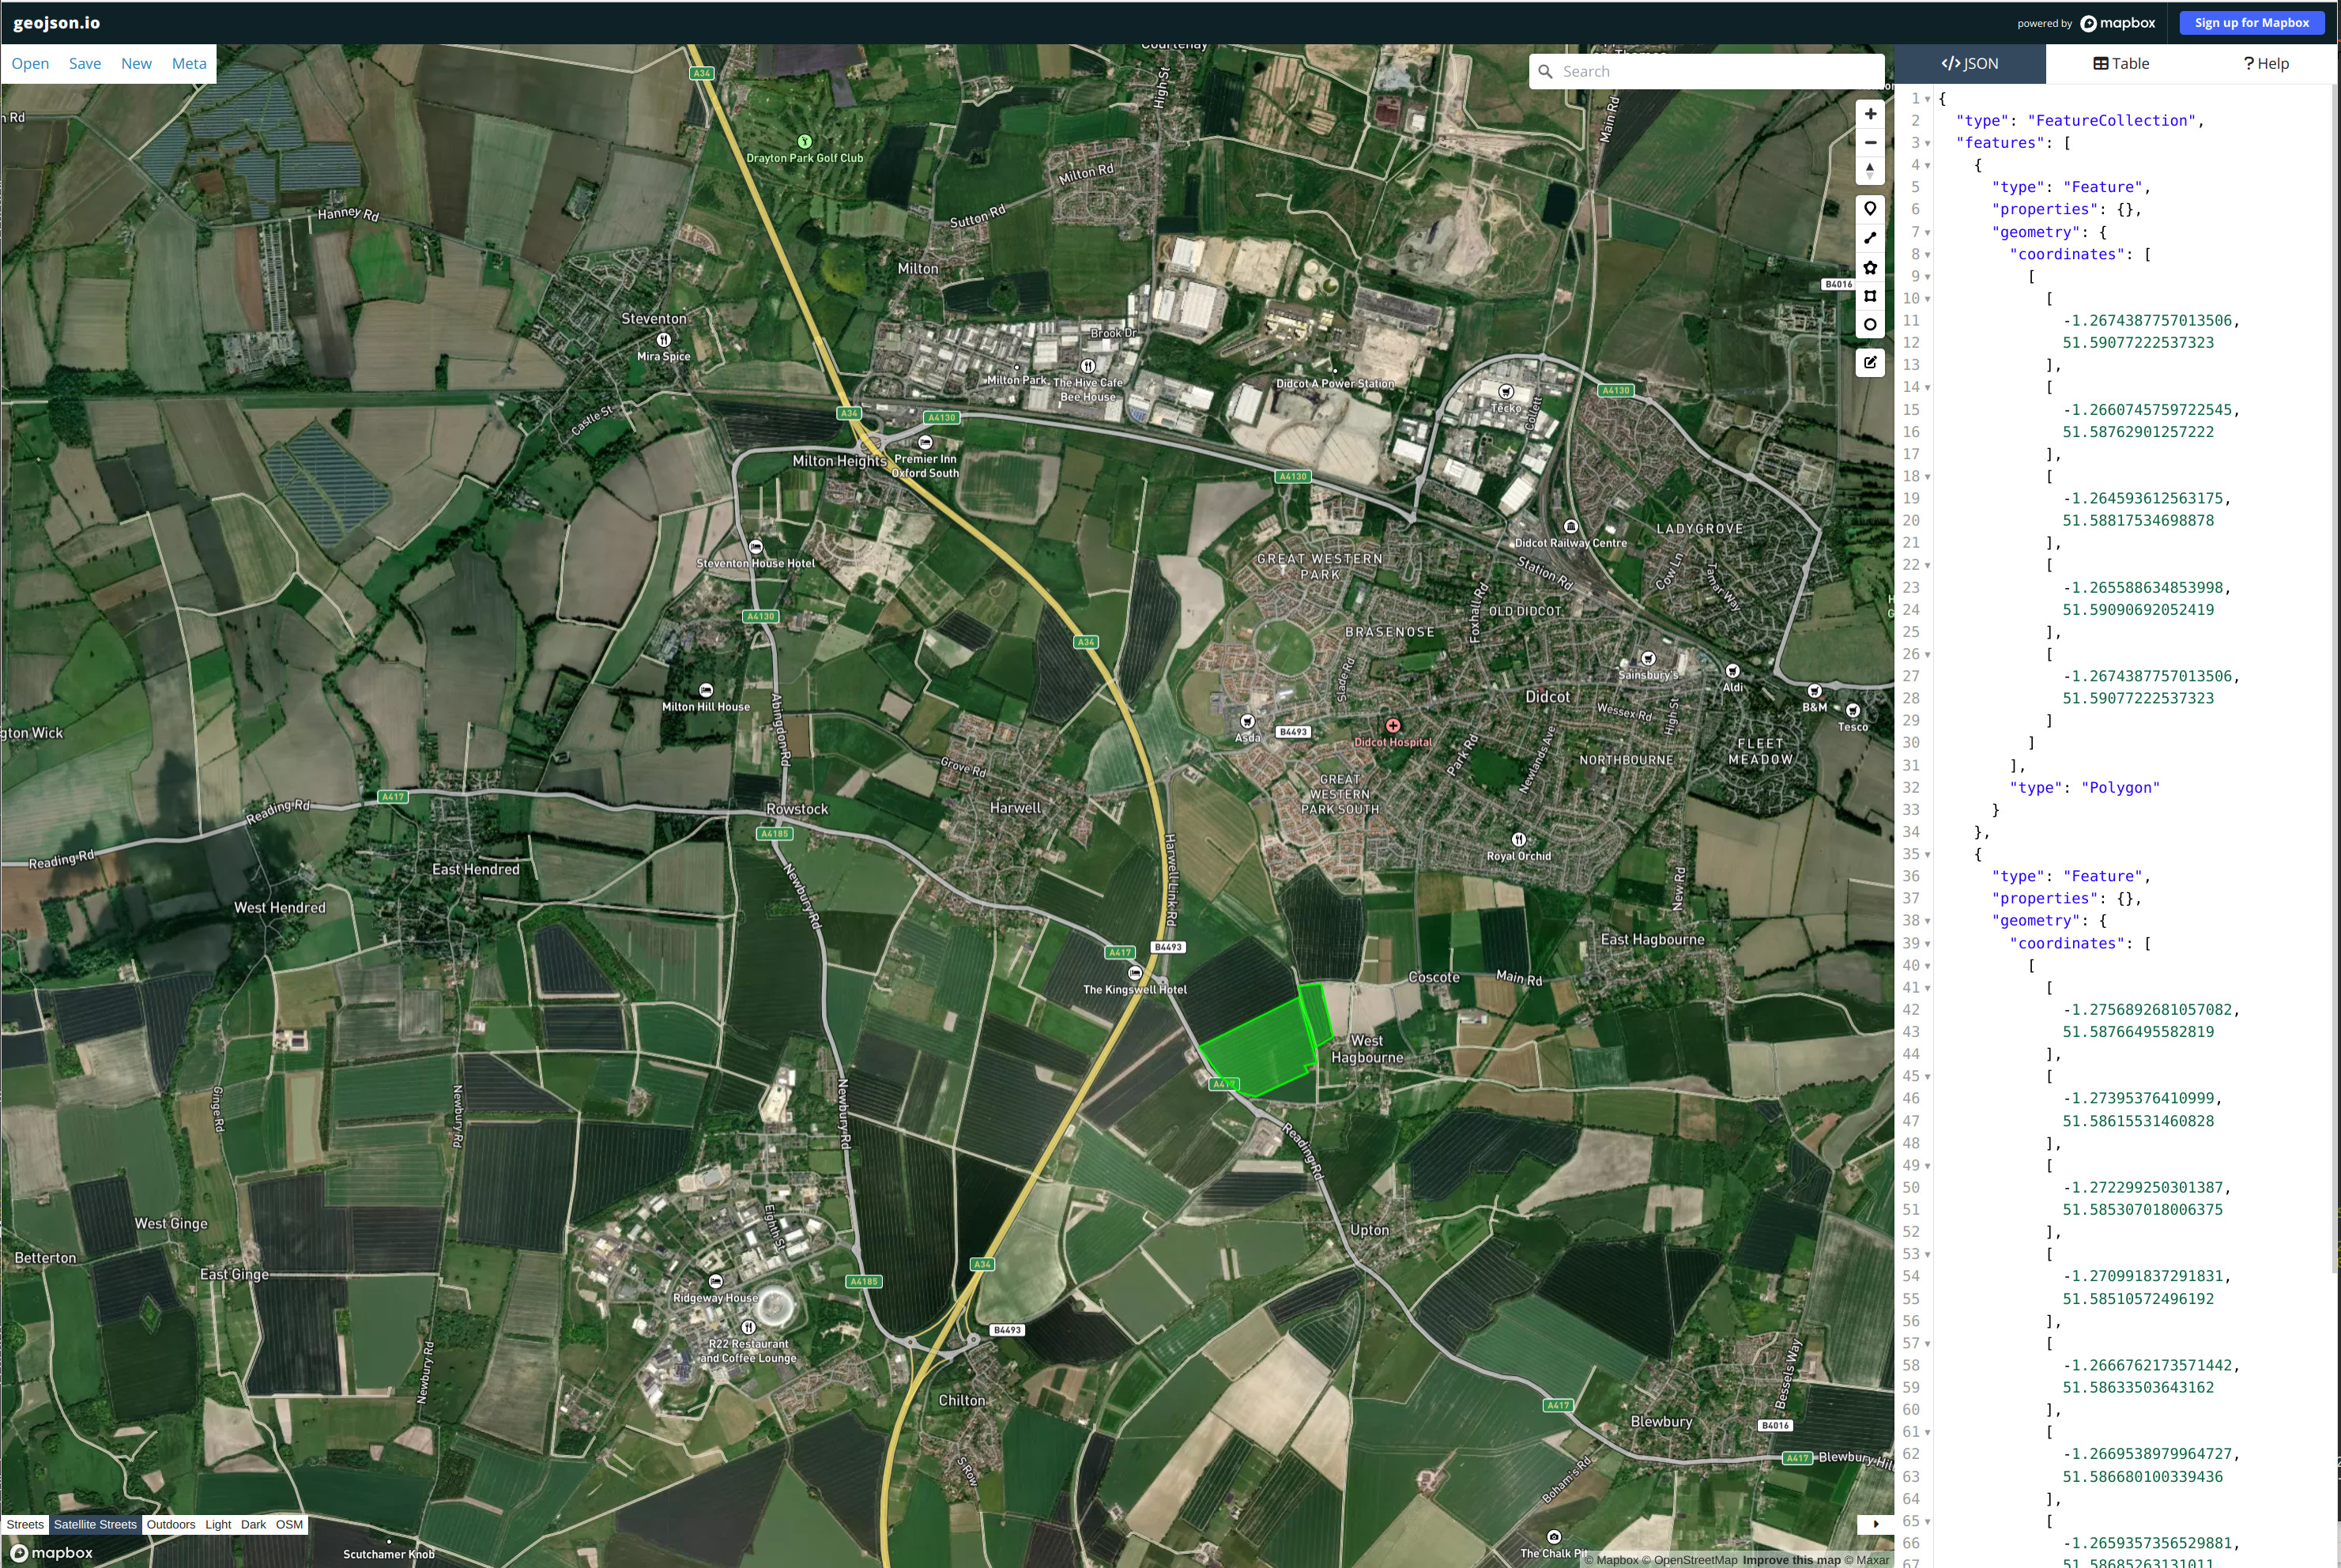
Images of West Hagbourne in GeoJSON.io.
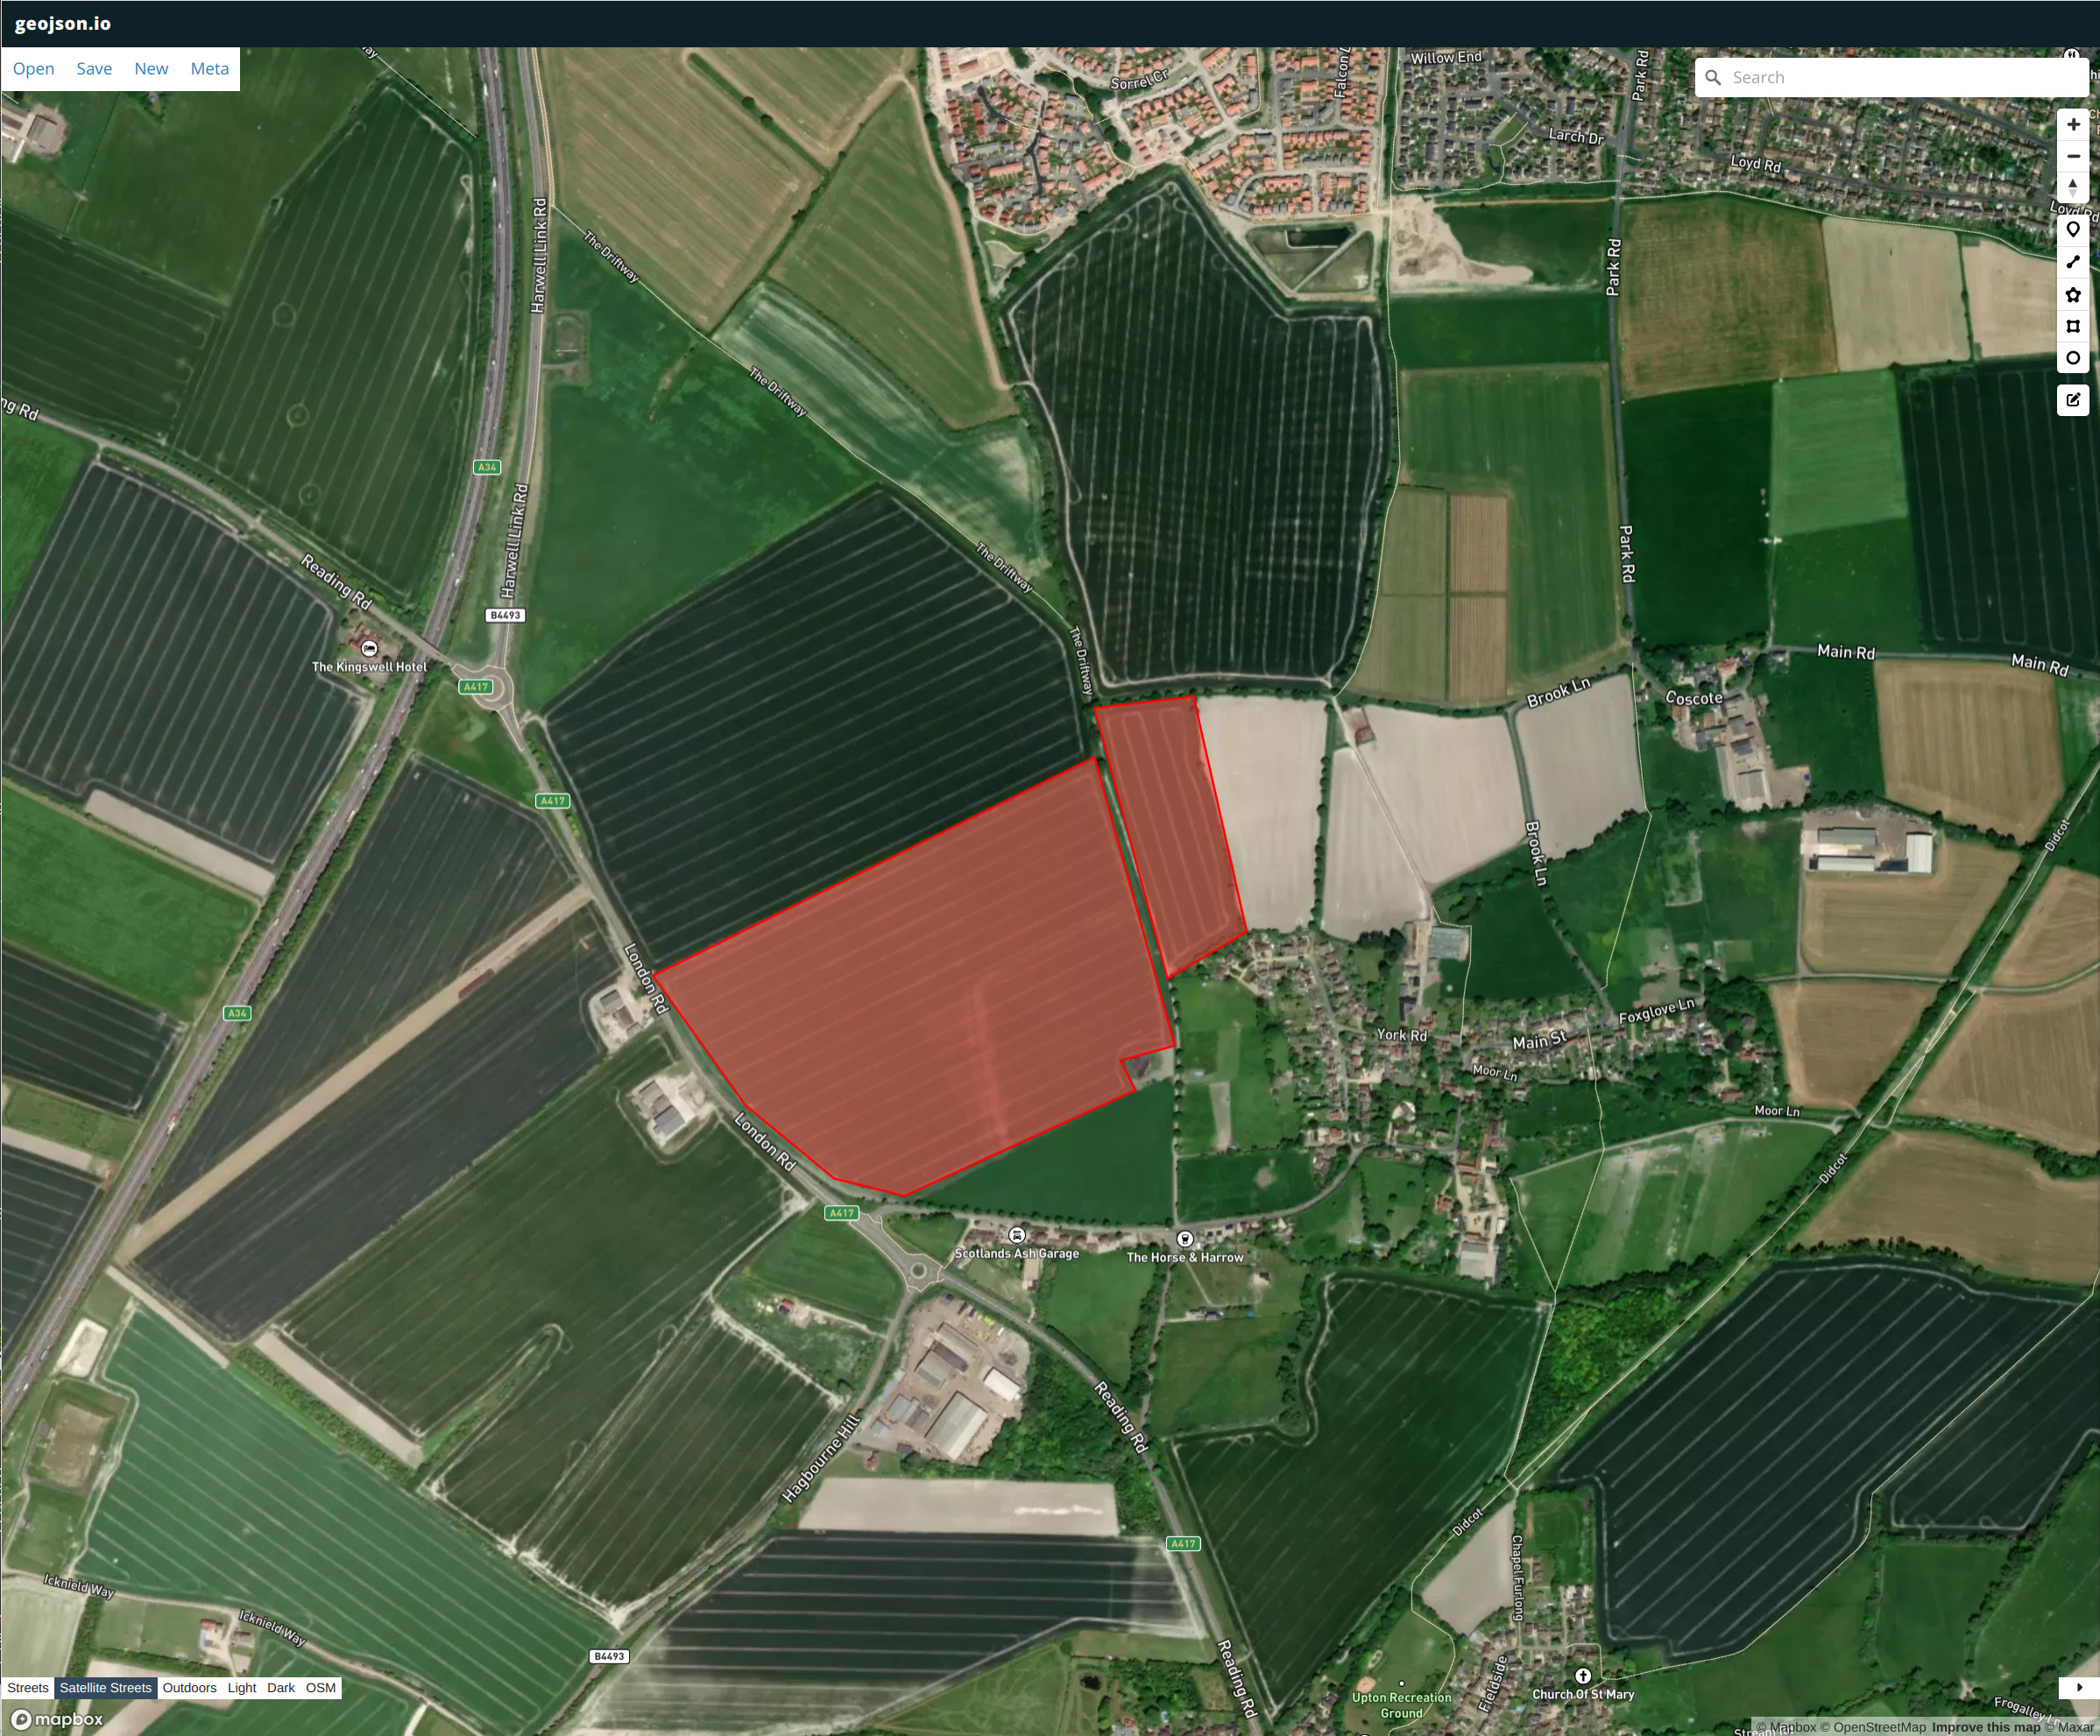
We need to have the boundaries of our fields in GeoJSON format and always in EPSG:4326 coordinates system. In the fields of our example, this will be:
[
  {
    "type": "Polygon",
    "coordinates": [
      [
        [
          -1.2674387757013506,
          51.59077222537323
        ],
        [
          -1.2660745759722545,
          51.58762901257222
        ],
        [
          -1.264593612563175,
          51.58817534698878
        ],
        [
          -1.265588634853998,
          51.59090692052419
        ],
        [
          -1.2674387757013506,
          51.59077222537323
        ]
      ]
    ]
  },
  {
    "type": "Polygon",
    "coordinates": [
      [
        [
          -1.2756892681057082,
          51.58766495582819
        ],
        [
          -1.27395376410999,
          51.58615531460828
        ],
        [
          -1.272299250301387,
          51.585307018006375
        ],
        [
          -1.270991837291831,
          51.58510572496192
        ],
        [
          -1.2666762173571442,
          51.58633503643162
        ],
        [
          -1.2669538979964727,
          51.586680100339436
        ],
        [
          -1.2659357356529881,
          51.58685263131011
        ],
        [
          -1.2674398391147292,
          51.59020247780313
        ],
        [
          -1.2756892681057082,
          51.58766495582819
        ]
      ]
    ]
  }
]
Once we have that data, we can add the fields to our MRV database with this request, giving them a custom name, e.g. we can name them
"West Hagbourne 01" and "West Hagbourne 02":
curl -X POST "https://mrv-gateway.prod.hummingbirdtech.com/v1/fields" \
  -H "Content-Type: application/json" \
  -H "ApiKey: <SECRET_KEY>" \
  -d '[{"client_field_id": "West Hagbourne 01", "boundary": {"coordinates": [[[-1.2674387757013506, 51.59077222537323], [-1.2660745759722545, 51.58762901257222], [-1.264593612563175, 51.58817534698878], [-1.265588634853998, 51.59090692052419], [-1.2674387757013506, 51.59077222537323]]], "type": "Polygon"}}, \
     {"client_field_id": "West Hagbourne 02", "boundary": {"coordinates": [[[-1.2756892681057082, 51.58766495582819], [-1.27395376410999, 51.58615531460828], [-1.272299250301387, 51.585307018006375], [-1.270991837291831, 51.58510572496192], [-1.2666762173571442, 51.58633503643162], [-1.2669538979964727, 51.586680100339436], [-1.2659357356529881, 51.58685263131011], [-1.2674398391147292, 51.59020247780313], [-1.2756892681057082, 51.58766495582819]]], "type": "Polygon"}}]'
The response from MRV API should be like this, having both fields registered:
[
  {
    "client_field_id": "West Hagbourne 01",
    "client_id": "7ce37b37-5811-4c7b-9cd8-08d4a641b7e2",
    "land_use": null,
    "country_code": null,
    "climate_zone": null,
    "boundary": {
      "type": "Polygon",
      "coordinates": [
        [
          [
            -1.267438776,
            51.590772225
          ],
          [
            -1.266074576,
            51.587629013
          ],
          [
            -1.264593613,
            51.588175347
          ],
          [
            -1.265588635,
            51.590906921
          ],
          [
            -1.267438776,
            51.590772225
          ]
        ]
      ]
    },
    "area": 4.082121268339859,
    "id": "affecf4c-c64d-4e5f-8eb7-c5de124652b8",
    "created_at": "2023-11-30T15:54:21.602344+00:00",
    "updated_at": null,
    "point": null
  },
  {
    "client_field_id": "West Hagbourne 02",
    "client_id": "7ce37b37-5811-4c7b-9cd8-08d4a641b7e2",
    "land_use": null,
    "country_code": null,
    "climate_zone": null,
    "boundary": {
      "type": "Polygon",
      "coordinates": [
        [
          [
            -1.275689268,
            51.587664956
          ],
          [
            -1.273953764,
            51.586155315
          ],
          [
            -1.27229925,
            51.585307018
          ],
          [
            -1.270991837,
            51.585105725
          ],
          [
            -1.266676217,
            51.586335036
          ],
          [
            -1.266953898,
            51.5866801
          ],
          [
            -1.265935736,
            51.586852631
          ],
          [
            -1.267439839,
            51.590202478
          ],
          [
            -1.275689268,
            51.587664956
          ]
        ]
      ]
    },
    "area": 21.956632731848703,
    "id": "4ff818c0-97c2-44f0-bd6e-72ab8f4be55d",
    "created_at": "2023-11-30T15:54:21.602344+00:00",
    "updated_at": null,
    "point": null
  }
]
As we can see, we just created 2 new fields in our database.
The system also added some extra data for us, like the unique MRV API id for the field, the
creation timestamp and even calculated the area for us automatically, in hectares.
Note
Our client is the only one that can see these fields. No other client can see them or trigger operations against them. Equally, we cannot see fields belonging to other clients.
Using the fields MRV ID, we are now ready to start triggering analyses operations on them.
Make an analysis Request#
For our example, we are going to request 2 analyses on the given fields: cover crops and ndvi.
We will request an analysis for these 2 MRV products within a time range of 4 months, from 1st May 2022 to 31st August of the same year. The actual HTTP request we need to perform for this is:
curl -X POST "https://mrv-gateway.prod.hummingbirdtech.com/v1/requests" \
  -H "Content-Type: application/json" \
  -H "ApiKey: <SECRET_KEY>" \
  -d '{"field_ids": ["affecf4c-c64d-4e5f-8eb7-c5de124652b8", "4ff818c0-97c2-44f0-bd6e-72ab8f4be55d"], \
      "capabilities": ["cover-crops", "ndvi"], \
      "start_date": "2022-05-01", \
      "end_date": "2022-08-31"}'
The response from MRV API, telling us that the request has been accepted and is going to be processed, will be:
{
  "id": "86c3c802-88ca-4d8f-9960-76fff38132cb",
  "status": "Pending",
  "created_at": "2023-11-30T16:00:54.215819+00:00",
  "updated_at": null,
  "start_date": "2022-05-01",
  "end_date": "2022-08-31"
}
The request will take some time to complete, depending on many factors like the number of fields requested to analyse, the time range span and the satellite imagery availability in the system.
You can configure automatic push-notifications to receive a message in your system once the request is finished, using the MRV API webhook setup.
Note
Satellite imagery is always cached so, for the same region and time range, request processing speed should be higher after an initial request, resulting in faster delivery of results.
Checking the Results#
Once the Request has finished processing, the results will always be available on the Request detail endpoint. The response payload for our example request would be:
curl -X GET "https://mrv-gateway.prod.hummingbirdtech.com/v1/requests/86c3c802-88ca-4d8f-9960-76fff38132cb/results" \
  -H "Content-Type: application/json" \
  -H "ApiKey: <SECRET_KEY>"
{
  "id": "86c3c802-88ca-4d8f-9960-76fff38132cb",
  "status": "Completed",
  "start_date": "2022-05-01",
  "end_date": "2022-08-31",
  "fields": [
    {
      "field_id": "4ff818c0-97c2-44f0-bd6e-72ab8f4be55d",
      "tillage": null,
      "deforestation": null,
      "cover_crop": {
        "has_cover_crop": false
      },
      "crop_type": null,
      "soil_moisture": null,
      "field_detection": null,
      "soil_type": null,
      "ndvi": {
        "monthly_average": {
          "2022-05": null,
          "2022-06": null,
          "2022-07": null,
          "2022-08": 0.1526535518197968
        }
      }
    },
    {
      "field_id": "affecf4c-c64d-4e5f-8eb7-c5de124652b8",
      "tillage": null,
      "deforestation": null,
      "cover_crop": {
        "has_cover_crop": false
      },
      "crop_type": null,
      "soil_moisture": null,
      "field_detection": null,
      "soil_type": null,
      "ndvi": {
        "monthly_average": {
          "2022-05": null,
          "2022-06": null,
          "2022-07": null,
          "2022-08": 0.1942992164743737
        }
      }
    }
  ]
}
Note
Once again, our client is the only who have access to all this data, the Request and its Results. Similarly, we won’t be able to access the data of another client.